vue.js入門7
はじめに
ここでなchapter3に入っていき、順番に作っていきます。
chapter3
section3-1
コンポーネントについてです。
コンポーネントの概要
以下のような使い方になります。
Vue.component{名前, {設定情報}};
- 第1引数がコンポー年との名前
- 第2引数がコンポーネントの具体的な設定
上記のコンポーネントをHTMLの中に記述することで挿入することができます。
<コンポーネント名 />
実装してみる
以下の実装をしてみます
<!DOCTYPE html>
<html>
<head>
    <meta charset="utf-8" />
    <meta http-equiv="X-UA-Compatible" content="IE=edge">
    <title>Page Title</title>
    <meta name="viewport" content="width=device-width, initial-scale=1">
    <link rel="stylesheet" type="text/css" media="screen" href="main.css" />
    <script src="main.js"></script>
    <script src="https://unpkg.com/vue"></script>
</head>
<body>
    <h1>hello component</h1>
    <div id="app">
        <hello/>
    </div>
    <script>
    Vue.component('hello',
    {
        template: '<p class="hellp">HelloHello!</p>'
    })
    new Vue({
        el: '#app',
    })
    </script>
</body>
</html>
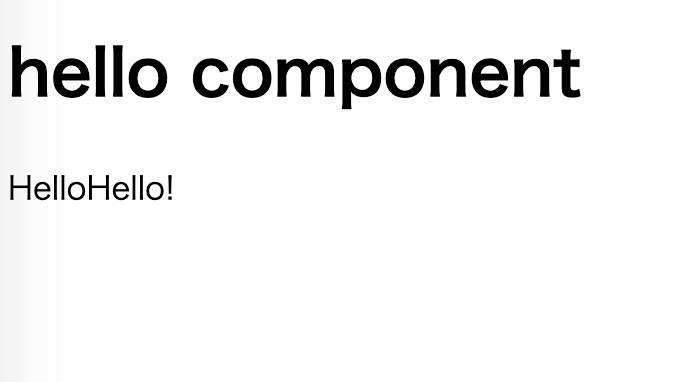
実際の表示は以下のようになります。

上記のHelloHello!の部分がコンポーネントに定義された部分になり
これがHTMLに挿入されているのがわかります。
変数をコンポーネントに渡す
用意したタグを表jいするだけでなく、変数に設定したものをコンポーネントに渡すようなことが可能です。
使い方
以下のように関数で定義する使い方になります。
data : function() {return { 変数の情報 }:}
使ってみる
<!DOCTYPE html>
<html>
<head>
    <meta charset="utf-8" />
    <meta http-equiv="X-UA-Compatible" content="IE=edge">
    <title>Page Title</title>
    <meta name="viewport" content="width=device-width, initial-scale=1">
    <link rel="stylesheet" type="text/css" media="screen" href="main.css" />
    <script src="main.js"></script>
    <script src="https://unpkg.com/vue"></script>
</head>
<body>
    <h1>variable component</h1>
    <div id="app">
        <hello/>
    </div>
    <script>
    Vue.component('hello',
    {
        data: function() {
            return {
                message: 'add message'
            }
        },
        template: '<p class="hello">{{message}}</p>'
    });
    new Vue({
        el: '#app',
    });
    </script>
</body>
</html>
属性の利用
propsを使う方法についてです。 記述としては以下のようになります。
props: [名前1, 名前2, ........]
特徴としては以下の通りです。 - 配列を値に持つプロパティである。 - 配列にはタグに用意される属性の名前をまとめておく - templateのテンプレート内で使うことができる
使ってみる
<!DOCTYPE html>
<html>
<head>
    <meta charset="utf-8" />
    <meta http-equiv="X-UA-Compatible" content="IE=edge">
    <title>Page Title</title>
    <meta name="viewport" content="width=device-width, initial-scale=1">
    <link rel="stylesheet" type="text/css" media="screen" href="main.css" />
    <script src="main.js"></script>
    <script src="https://unpkg.com/vue"></script>
</head>
<body>
    <h1>hello component</h1>
    <div id="app">
        <div><hello name="dog"/></div>
        <div><hello name="cat"/></div>
    </div>
    <script>
    Vue.component('hello',
    {
        props:['name'],
        template: '<p class="hello">Hello {{name}}</p>'
    })
    new Vue({
        el: '#app',
    })
    </script>
</body>
</html>
pointは以下の部分になります。
- componentの第2引数に用意しているpropsのところ
- propsに[name]と指定することで、helloタグにname属性が用意される
- テンプレートに{{name}}という形で変数を入れることができる
タイプの指定
どういったタイプの値が設定されるかという指定をしたい場合に以下のようにオブジェクトとして 設定することができます。
props: {名前: タイプ, 名前: タイプ, ...}
実装例
<!DOCTYPE html>
<html>
<head>
    <meta charset="utf-8" />
    <meta http-equiv="X-UA-Compatible" content="IE=edge">
    <title>Page Title</title>
    <meta name="viewport" content="width=device-width, initial-scale=1">
    <link rel="stylesheet" type="text/css" media="screen" href="main.css" />
    <script src="main.js"></script>
    <script src="https://unpkg.com/vue"></script>
</head>
<body>
    <h1>hello component</h1>
    <div id="app">
        <div><hello name="dog"/></div>
        <div><hello name="cat"/></div>
    </div>
    <script>
    Vue.component('hello',
    {
        props:{ name: String},
        template: '<p class="hello">Hello {{name}}</p>'
    })
    new Vue({
        el: '#app',
    })
    </script>
</body>
</html>
以下抜粋します。propsのところにStringを指定する形にしています。
props:{ name: String},
上記の型にはStringの他にもNumber、Boolean、Array、Objectなどが用意されています。
section3-1まとめ
以下に見てきました。 - componentの概要 - componentで変数を使う方法 - 属性を使う - 型も定義可能
次はsection3-2について見ていきます。